February 10, 2026
•
8 minute read
How to Fix a Bike Pedal Axle
You've just set out for your favourite weekend ride, only to feel your pedal wobble with each turn. Annoying, right? A faulty bike pedal axle isn't just an irritation; it can dangerously compromise your bike's performance.
Jake Fieldsend
Founder & CFO
You've just set out for your favourite weekend ride, only to feel your pedal wobble with each turn. Annoying, right? A faulty bike pedal axle isn't just an irritation; it can dangerously compromise your bike's performance. Whether you feel a persistent looseness or hear an unsettling creak, it’s time to get hands-on, or you risk further damage to your drivetrain. Let’s unpack the ins-and-outs of tackling this task head-on, ensuring you're not left stranded mid-journey. Understanding how to fix a bike pedal axle will not only save you a trip to your local shop but also swell your chest with a DIY triumph.
1. Understanding the Problem
1.1 What's Wrong with My Pedal Axle?
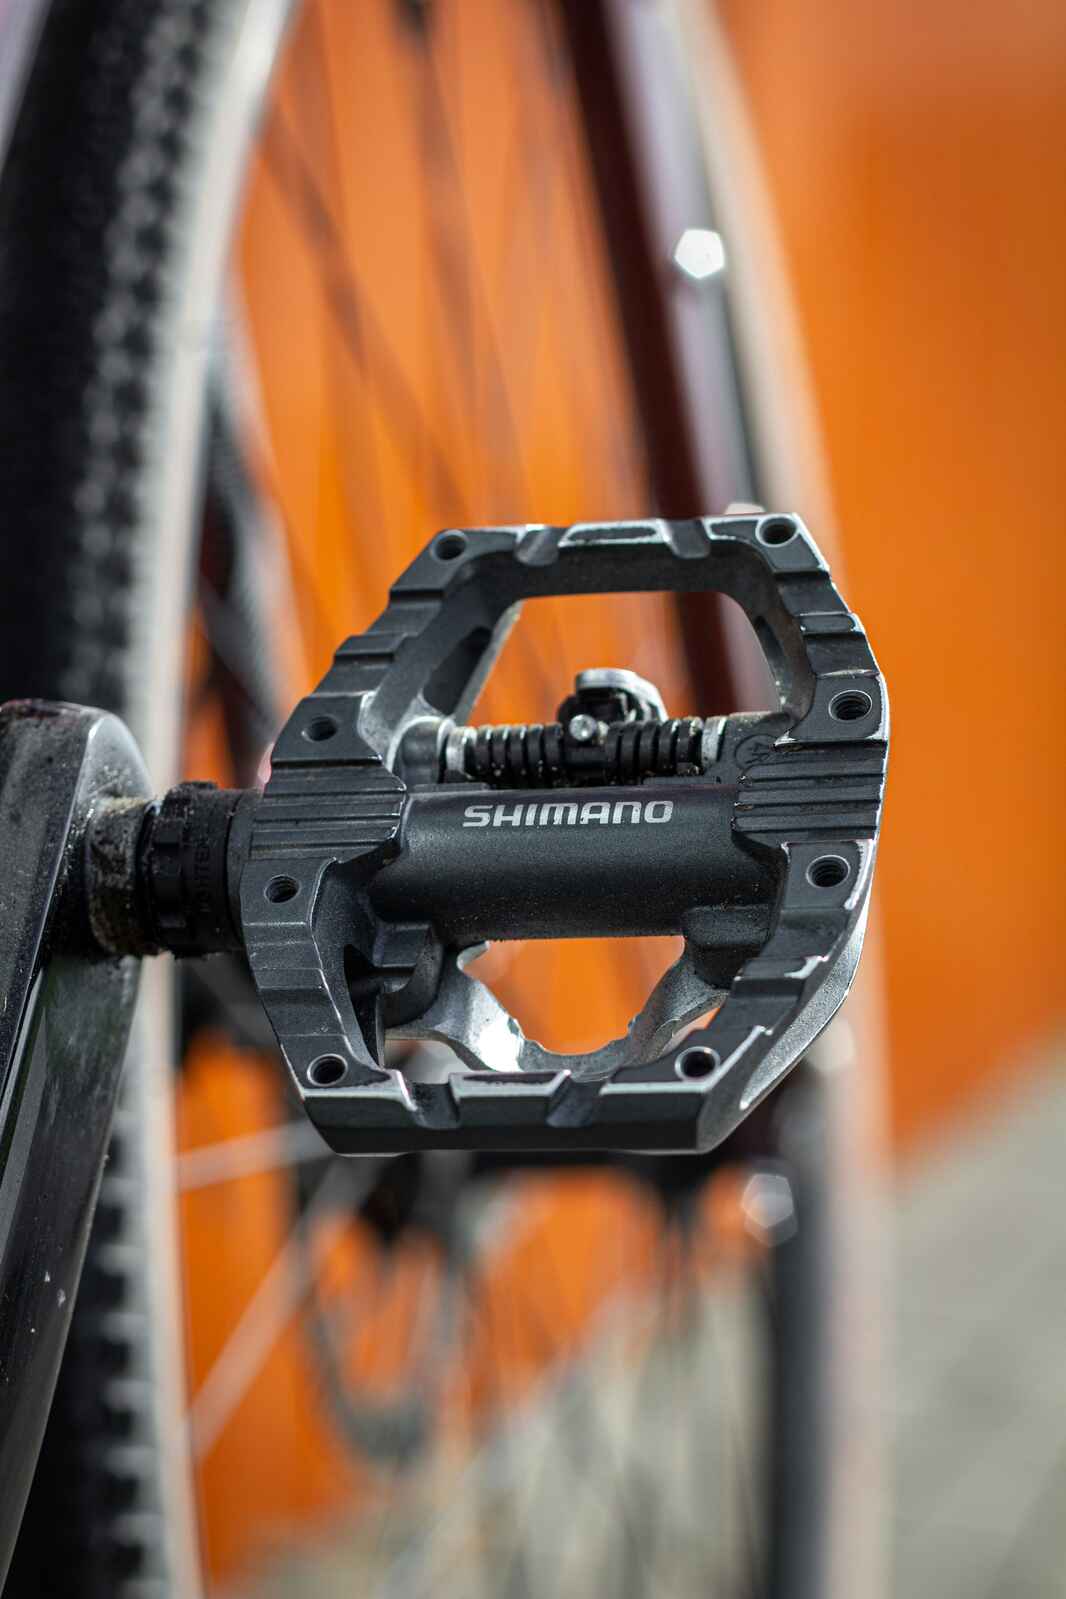
The pedal axle, tucked within your bike’s pedals, serves as the unsung hero of seamless cycling. But when wear and tear creep in, problems like slackness and malfunction arise, hindering your performance. Additionally, complications can stem from excessive dirt accumulation, bent components or simply old age. Catching these disturbances early allows for quick rectification before they develop into costly issues, saving you time and keeping your rides smooth.
Key Indicators:
- Wobbling Pedals: Noticeable movement signifies axle or bearing wear.
- Creaking Sounds: Creeping or cracking noises often result from a lack of lubrication.
- Resistance: Increased pedal effort can indicate internal interference.
Pro-tip: Periodically inspecting your pedals for foreign debris can forestall many axle woes.
1.2 Signs You Need a Pedal Axle Repair
Spotting the early signs of axle distress can mean the difference between a quick fix and extensive repair. If every rotation of the pedal makes an audible noise or feels inconsistent, a closer inspection is justified. Remember, overlooking these small red flags can escalate the problem, resulting in further strain and possibly irreparable damage to the pedal, crankarms, or even the chainring.
Warning Signs:
- Unexpected Clicking: Persistent clicking can mean that the axle isn’t seated properly.
- Inconsistency While Cycling: Variations in smoothness lead to inefficient pedalling and extra effort.
- Visual Damage: Cracks or visible bending on pedals or axle necessitate immediate attention.
Pro-tip: Treat minor clicks and squeaks as urgent. Addressing them early can prevent click-related escalation.
1.3 The Role of the Pedal Axle in Bike Performance
The pedal axle forms the backbone of your bike's drivability. In practical terms, it translates your energy into forward momentum, playing a crucial role in maintaining a bike's speed and stride. Baring this in mind, the axle’s integrity directly influences overall cycling efficiency and safety. An undetected axle flaw can ripple through the bike’s mechanics, causing inefficient energy transfer and potentially hazardous riding conditions.
Essential Functions:
- Energy Transfer: Facilitates smooth conversion of pedalling into motion.
- Stability: A well-maintained axle underpins overall bike balance.
- Longevity: Careful axle upkeep prolongs the lifespan of the bike and its components.
Pro-tip: Regular TLC can avert sudden mechanical failures, offering peace of mind on those extended tours.
2. How to Fix Bike Pedal Axle
2.1 Tools You Need for the Job
Getting the right tools makes pedal axle repair a breeze. Here's what you need to have on hand:
- Pedal Wrench: A sturdy, non-slip grip wrench is essential for removing pedals. Most pedals require a 15mm wrench, so having one in your toolkit is crucial.
- Grease: Choose a high-quality bicycle grease to ensure smooth reassembly and prevent future pedal axle woes.
- Allen Keys: Pedals often have 6mm or 8mm Allen bolts; having a full set will provide the flexibility to adjust any bolt size.
- Adjustable Wrench: Useful for fixing small nuts and bolts you might encounter during disassembly.
- Cleaning Brushes or Cloths: Keeping components clean prevents dirt from damaging the axle or making repairs more complex.
Remember, having the right tools at your fingertips can prevent frustrations and minimise mistakes.
Pro-tip: Before purchasing tools, inspect your pedals closely. Some specialty pedals may need specific tools; double-check to avoid unnecessary expenses.
2.2 Step-by-Step Guide on Fixing the Pedal Axle
Repairing a pedal axle isn't as mysterious as it seems. Follow these precise steps to restore your pedal's functionality:
- Remove the Pedal: Use your pedal wrench or Allen key to unscrew the pedal. Hold the crank arm steady to avoid unnecessary strain.
- Clean Components: Once removed, clean all pedal parts with a cloth or brush to remove grime that could hinder recognition of damage.
- Inspect the Axle: Look for signs of wear such as flat spots or evident bending. Replace the axle if severe damage is evident.
- Grease and Reassemble: After inspecting or replacing the axle, apply grease liberally. Reassemble the pedal parts, ensuring each component is securely fitted.
- Reattach the Pedal: Secure the pedal back onto the crank arm, turning anti-clockwise for left, clockwise for right pedals, until tight.
Always ensure each step is completed thoroughly to guarantee a long-lasting repair outcome.
Pro-tip: Use thread locker when reattaching pedals to hold the axle in place securely. It provides additional stability during rides.
2.3 When to Seek Help from Bikebook Professionals
Sometimes pedal axle issues might throw you off guard, requiring expert intervention. Here’s when to consider professional help:
- Complex Damage: If the axle has complex wear or has snapped, professional tools and expertise will make replacement safer and more efficient.
- Time Constraints: Don’t have enough time to tackle the repair yourself? Searching “bike service near me” on the Bikebook platform is your fast-track to local, trusted mechanics.
- Repeated Failures: If your fixes don’t hold, let a pro handle it to identify underlying problems and ensure lasting results.
Bikebook offers a seamless way to connect with local mechanics who are well-versed in tackling stubborn pedal axle problems.
Pro-tip: Utilise Bikebook for its competitive comparison of local services, ensuring you receive quality repairs at reasonable prices without the hassle of multiple searches.
3. Maintaining Your Bike Pedals
3.1 Regular Maintenance Tips
Maintaining your bike pedals regularly isn't just beneficial; it's essential. An often overlooked task in bike upkeep, keeping pedals in good shape ensures your rides stay smooth and trouble-free. Here’s how you can keep them in prime condition:
- Inspect regular: Check for wear and tear each time you ride.
- Clean thoroughly: Remove dirt and grime build-up after every few rides.
- Lubricate wisely: Apply a thin layer of grease to the axle to prevent rust and ensure comfortable pedaling.
- Adjust tension: Keep an eye on pedal tension to enhance efficiency and safety.
- Check for tightness: Ensure the pedals are securely attached to avoid loose maneuvering.
Sometimes, it might seem tedious to carry out regular maintenance. However, by making it a habit, you prevent costly repairs or even replacements. Bear in mind that regular cleaning and attention ensure the pedals last longer and perform effectively. Keeping grime away from the pedal axle allows the bike to perform optimally in various terrains.
Pro-tip: Allocate 10 minutes post-ride to inspect and clean your pedals—this small step can save you in the long run!
3.2 How Often to Service Your Bike Pedals
How often you should service your pedals depends on how frequently you ride and under what conditions. For avid cyclists, servicing them every two months is advisable. But if you take your bike out on muddy trails or rainy paths, consider doing it more often. Here’s a checklist to keep in mind:
- Weekly rides: Inspect and clean the pedals monthly.
- Consistent daily commutes: Every three weeks, inspect them for wear.
- Post-off-road adventures: Clean thoroughly after each ride to prevent dirt build-up.
- Seasonal maintenance: Deep clean and check for rust as seasons change.
- Pre-event tune-up: Always service before an important cycling event.
Seasonal changes can affect how often you should take a closer look at your bike’s mechanics. You don’t want your perfect summer rides jeopardised by neglected winter grime. Prioritise regular checks, particularly after wet and muddy rides, to maintain pedal performance.
Pro-tip: Make a bi-monthly checklist to ensure you don't overlook any key areas of pedal maintenance!
3.3 Using Bikebook to Find Local Maintenance Help
When DIY isn't enough, knowing where to turn can make all the difference. Bikebook simplifies locating trustworthy mechanics nearby by compiling local expertise into one easy-to-access platform. Struggling with mechanic prices, location, or availability? Here’s how Bikebook addresses those pain points:
- Quick searches: Enter your postcode and get instant results of nearby professionals.
- Compare mechanics: Based on reviews, ratings, and pricing, select the most suitable service.
- Local focus: Discover mechanics rooted in your community who understand local terrain conditions.
- Mobile options: Look for mobile mechanics if transporting your bike is an obstacle.
- Prolong bike longevity: Routine services by professionals keep your bike riding like new longer.
With thousands of local options available, you’re always supported by vetted experts dedicated to exceptional service. Whether it’s a general tune-up or a specific pedal issue, Bikebook provides you the access and confidence to keep your bike thriving.
Want to simplify your bike servicing needs? Explore a wide range of trusted professionals through Bikebook to keep your wheels spinning effortlessly!
Maintaining your bike pedals demands regular attention, from lubrication to tune-ups. However, when things get beyond your expertise, seeking help from platforms like Bikebook ensures your ride remains seamless and safe. Keep your biking adventures smooth with regular maintenance and local professional help.
Frequently Asked Questions
How to fix a loose bike pedal axle?
Tightening a loose pedal axle involves removing the pedal with a wrench, checking the threads, applying grease, and screwing it back securely. If the axle is stripped, replace it for safe riding.
Can you rethread a bike pedal?
Yes, rethreading is possible using a pedal tap; this cleans and redefines the threads. Clean before tapping and use lubrication for a smoother process.
Why does my bike wobble when I pedal?
Wobbling can be due to a loose pedal axle, uneven tyre inflation, or a misaligned wheel. Check and correct these components for a smoother ride.
Why is my bike pedal not working?
A pedal might fail due to a broken axle, loose attachment, or debris obstruction. Inspect and clean regularly, and tighten any parts as needed.


