February 16, 2026
•
8 minute read
How to Fix a Bike Wheel
You've finally carved out some time for that scenic bike ride you've been dreaming about when—disaster strikes—a wobbly or punctured wheel threatens to derail your plans.
Jake Fieldsend
Founder & CFO
You've finally carved out some time for that scenic bike ride you've been dreaming about when—disaster strikes—a wobbly or punctured wheel threatens to derail your plans. It's a common scenario for cyclists, but don't worry. This guide is here to equip you with all the skills you need to confidently fix your bike wheel and get back on the road.
1. Preparing to Fix Your Bike Wheel
1.1 Gather Necessary Tools
First things first, having the right tools is a game changer for any successful wheel repair. Before you start, ensure you have the following:
- Tyre Levers: Essential for removing a bike tyre from the wheel rim.
- Spanner: Ideally an adjustable one to tackle different sizes.
- Pump: Make sure it matches your valve type, whether Presta or Schrader.
- Repair Kit: Includes patches, adhesive, and sandpaper for inner tube repairs.
- Spoke Wrench: Useful for truing a wheel or replacing broken spokes.
Invest a little time in double-checking that everything you need is within reach. A tidy, organised workspace can also speed up the process significantly.
Pro-tip: Keep a multi-tool kit handy on rides—models like the Topeak Alien II include many essentials you might need.
1.2 Identify the Issue with Your Bike Wheel
Before diving into repairs, pinpoint the exact problem. Wheels can misbehave in various ways:
- Wobbling: Often signals a damaged spoke or a misaligned wheel.
- Flats: Caused by punctures, usually from nails or thorns.
- Slow Leak: Could be a valve issue or a tiny puncture not easily visible.
Inspect your wheel meticulously. Spin it by hand and observe for any irregularities. Feel free to run your fingers gently around the tyre to detect sharp objects or damage.
If you're uncertain, use soapy water to pinpoint slow leaks. The bubbling effect will indicate air escaping.
1.3 Safety First: Precautions Before Starting
Never underestimate the power of safety precautions. While repairing your wheel, ensure:
- Gloves: Protect your hands from cuts and dirt.
- Eye Protection: Especially important when dealing with sharper tools or vigorously pumped tyres.
- Stable Surface: Keep your bike on a flat, non-slippery surface.
It's also wise to disconnect your bike's brakes when you remove the wheel. This prevents accidental tightening that could impede the repair process.
Always deflate the tyre before attempting to change an inner tube to avoid unintentional air bursts that could cause injury.
2. Step-By-Step Guide: How to Fix a Bike Wheel
2.1 Removing the Wheel
First off, you'll need to take the wheel off your bike. This is a critical start to fixing your bike wheel. Begin by releasing the brake system if it's engaged – you can't remove the wheel otherwise. For bikes with rim brakes, simply squeeze the brake arms to release the tension and unhook the cable. If your bike has disc brakes, ensure the calipers aren't clamping the rotor.
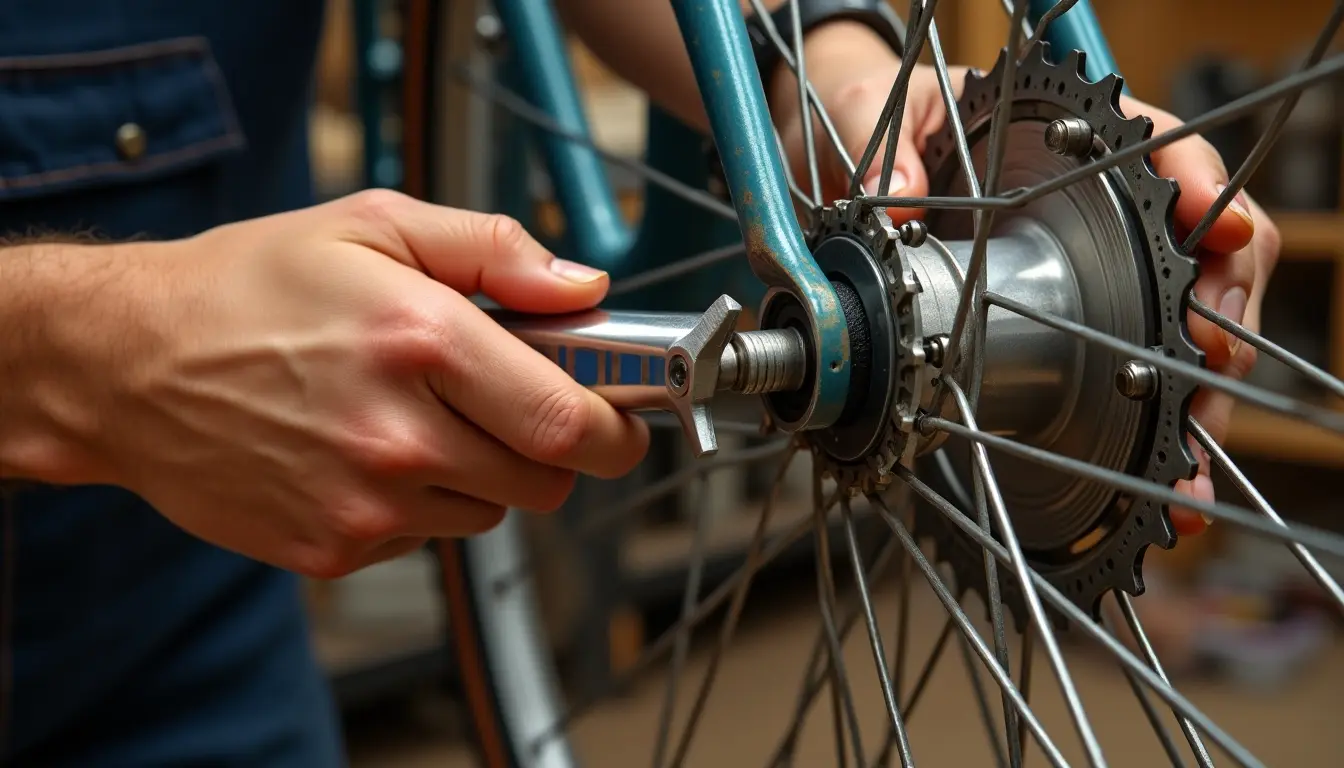
Next, you'll address the quick-release lever or axle nuts, depending on your bike type. For a quick-release system, pull the lever open and spin it counter-clockwise. Motors with axle nuts will require a spanner or wrench. Remember, the rear wheel removal could be more challenging due to the derailleur, so you may need to nudge it gently to the side to free the wheel. Ensuring the chain doesn’t snag during the process is key.
Pro-Tip: If you're removing the rear wheel, shift the derailleur to the smallest cog to ease the process.
2.2 Inspecting and Fixing the Tyre
With the wheel off, it’s time to inspect the tyre for any visible damages or foreign objects stuck in the tread. Check for cuts, punctures, or embedded shards like glass or metal which can cause flats. If you spot something, use tyre levers to gently prise the tyre bead away from the rim, creating enough room to remove the object.
After addressing visible issues, inflate the tyre partially to help locate slower leaks. Listen or feel for air escaping which indicates a hole. Mark any discovered damages with chalk. If the tyre is beyond repair, be prepared to replace it entirely. Always rotate the wheel under some light, observing for any irregularities like bumps indicating structural damage.
Pro-Tip: Always inspect both the external surface and interior lining of the tyre to ensure nothing is lodged in there that could puncture the inner tube again.
2.3 Replacing or Repairing the Inner Tube
After dealing with the tyre, your focus shifts inside to the inner tube. If punctured, you need to either patch or replace it. Start by deflating it completely to make manoeuvrability easier. Gently pull the tube from the rim, avoiding tearing around the valve stem.
Tube Repair Steps:
- Locate the puncture: Submerge the tube in water and watch for bubbles.
- Mark and dry: Clearly mark any holes and pat the tube dry.
- Prepare and apply patch: Roughen the area around the puncture and apply vulcanising solution. Once tacky, press the patch firmly, ensuring an airtight seal.
For replacement, make sure the new tube matches the tyre size and type. Partially inflate to give it shape, then insert it into the tyre before seating back onto the rim. Align the valve stem correctly to avoid undue stress and pinching.
Pro-Tip: Keep a spare tube in your cycling kit as an expedient fix for mid-ride punctures.
2.4 Putting the Wheel Back On
Reattaching the wheel is simpler if all preceding steps were correct. Align the axle with your bike's dropouts, ensuring the wheel is centred, and the brakes and derailleurs are unobstructed. Engage the quick-release lever, guaranteeing it’s tight without needing brute force. For wheel nuts, tighten with a wrench, alternating sides to ensure the wheel is straight.
Before hitting the trail, double-check the wheel spins without wobble which indicates true alignment. Finally, reconnect brake cables (if required) ensuring they’re responsive and the pads are correctly positioned on the rims. A quick check ensures the brakes engage and release properly without rubbing.
Pro-Tip: Spin the wheel freely before riding to ensure it is seated correctly and that brakes and gears function seamlessly.
3. When to Seek Professional Help
3.1 Complex Wheel Repairs
When faced with a particularly tricky wheel issue, sometimes it's best to call in a professional. Complex repairs might include tackling extreme imbalances, such as complete wheel true or rebuilding wheels with substantial damage. Additionally, mastering spoke tension can be a challenge. Working with professionals ensures that the underlying structures are sound and your ride is safe.
Professional mechanics often utilise specialised equipment that can detect even the smallest imperfections. They can:
- Perform precision truing for wobbling wheels
- Rebuild wheels with extensive spoke damage
- Assess structural integrity post-accidents
- Ensure proper spoke tension for optimal performance
- Replace damaged hubs efficiently
3.2 Finding a Local Mechanic with Bikebook
Finding a reliable mechanic can save you headaches and hefty long-term costs. Bikebook facilitates quick connection to local specialists. Simply enter your postcode, and you'll access hundreds of trustworthy reviews. This ensures informed decisions, especially if your local search yields limited options or you seek competitive pricing.
Key benefits of using Bikebook:
- Comprehensive listings of local mechanics
- Transparent reviews from fellow cyclists
- Easy comparison of rates and services
- Access to mobile mechanics if transportation is tricky
- Free to use without hidden fees
3.3 Benefits of Professional Bike Wheel Repair
Opting for professional wheel repair offers more than just peace of mind. Professionals can enhance your bike's longevity and performance through meticulous care. Relying on their expertise also mitigates potential damage from DIY attempts. A professional touch ensures the finest tuning and adjustments, allowing for smoother, safer rides.
Advantages include:
- Extended lifespan of your bike components
- Reduced risk of recurring issues
- Access to high-grade tools and parts
- Personalised service tailored to your bike's needs
- Certified mechanics ensure high-quality workmanship
In conclusion, while DIY repairs can be fulfilling and budget-friendly, knowing when to seek expert help is vital. Whether you're tangled in a complex wheel quandary or require a quick fix, having access to local, reliable mechanics through platforms like Bikebook streamlines the process. This ensures your bike remains in peak condition, ready for any adventure. Want to keep your bike in top shape effortlessly? Discover more about local mechanic options with Bikebook.
Frequently Asked Questions
Can you repair a bike wheel?
Yes, a bike wheel can often be repaired, depending on the damage. Common fixes include tightening spokes, truing the wheel, repairing or replacing the tyre, or swapping out the inner tube. Severe damage usually requires professional intervention to ensure safety and wheel integrity.
How to fix a bike wheel that is out of round?
To fix a bike wheel that's out of round:
- Identify the problem areas with a truing stand or tip wire to guide adjustments.
- Loosen spokes opposite to the bulge.
- Gradually tighten adjacent spokes to compress the bulge.
- Spin and adjust until the wheel runs true.
How to fix a bike wheel buckled?
- Loosen affected spokes on the buckle's side.
- Tighten evenly on the opposite area to pull back into alignment.
- Continuously check wheel spin to detect and fix any wobbling until straight.
How to fix a bike wheel puncture?
- Remove the wheel from the bike.
- Take out the inner tube.
- Find the puncture using water to spot escaping air bubbles.
- Patch or replace the damaged tube.
- Reassemble the wheel and inflate to the correct pressure.


