February 28, 2025
•
7 minute read
How to Fix a Bike Puncture Without Removing the Wheel
You hear the dreaded hiss of air escaping from your tyre just as you're about to enjoy a scenic bike ride. Panic sets in—how will you fix this without proper tools or a workstation nearby?
Jake Fieldsend
Founder & CFO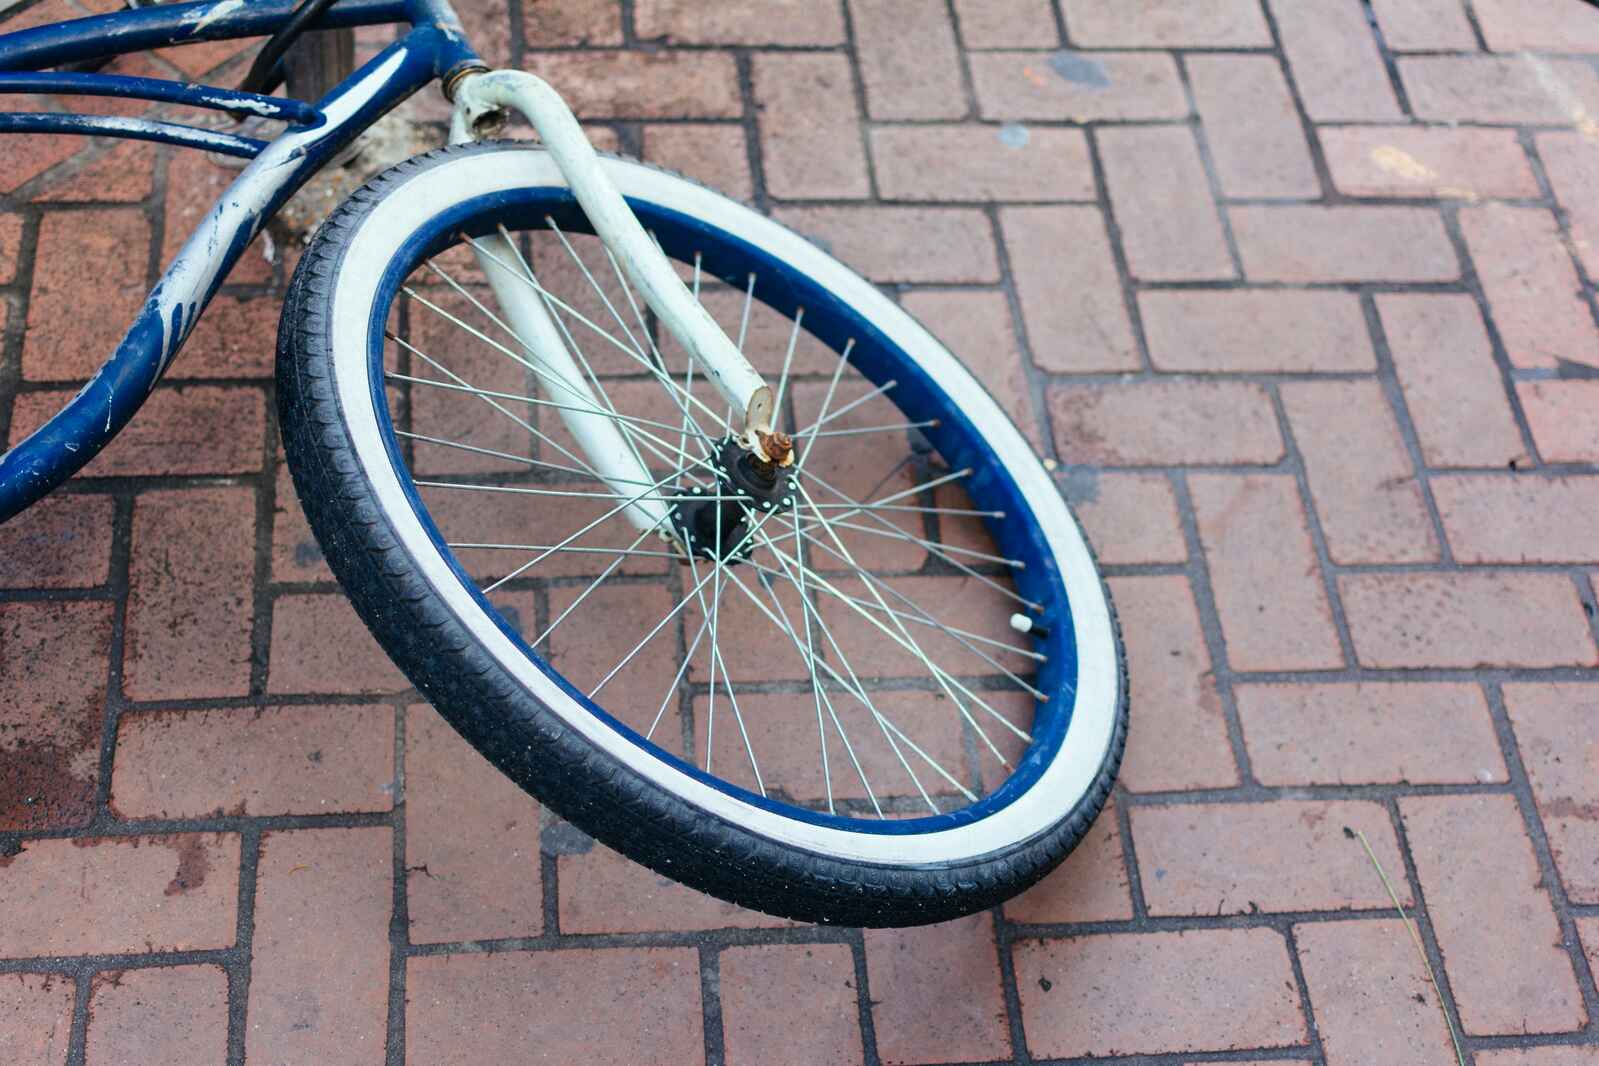
How to Fix a Bike Puncture Without Removing the Wheel
You hear the dreaded hiss of air escaping from your tyre just as you're about to enjoy a scenic bike ride. Panic sets in—how will you fix this without proper tools or a workstation nearby? Fortunately, learning how to fix a bike puncture without removing the wheel is straightforward, and you can do it with a few simple tools right where you are. This guide will walk you through finding and patching the puncture efficiently, so you can get back to enjoying the open road.
1. Preparing for the Repair
1.1 What Do You Need?
Gathering the right tools is the first step. You'll need a puncture repair kit, which generally includes patches, glue, a piece of sandpaper, and a tyre lever. Having a mini-pump or CO2 inflator is crucial for re-inflating the tyre. If you don’t have these on-hand, make a mental note or a checklist for your bike rides. An additional resilience measure is keeping rubbing alcohol or water and a cloth; these help in cleaning the puncture area for a better seal.
- Puncture Repair Kit: Patches, glue, sandpaper, tyre lever.
- Mini-Pump/CO2 Inflator: Quick inflation on-the-go.
- Rubbing Alcohol/Cloth: Cleans tyre before patching.
Pro-tip: Keep a compact tool set attached to your bike or comfortably in your backpack so you're always ready for emergencies.
1.2 Finding the Puncture
To locate the puncture, carefully examine the outer tyre for visible damage like embedded objects or hissing noises, indicating air escape. If these aren't obvious, inflate the tyre slightly and listen closely for a whistling sound. Another effective technique involves using water: trickle water along the tyre—you’ll spot bubbles forming at puncture sites.
- Visual Inspection: Look for debris or cuts.
- Auditory Clues: Listen for hissing sounds.
- Water Test: Notes where bubbles appear.
Pro-tip: Ensure to remove any foreign objects that might still be causing damage to prevent future punctures.
1.3 Preventing Further Damage
Taking precautions can save more complex repairs later. If you spot debris or sharp objects, wear gloves to prevent injuries whilst removing them. A damaged tyre should be deflated slightly after identifying the puncture to avoid worsening the tear. Knowing when to seek professional help is key; using Bikebook’s platform can connect you with local experts if your repairs require more than basic solutions.
- Remove Debris: Use gloves for safety.
- Controlled Deflation: Prevent tear expansion.
- Seek Expertise: Use Bikebook for professional aid if needed.
Pro-tip: Regularly inspecting your tyres after rides can catch small damages before they become major issues.
2. Fixing the Puncture Without Wheel Removal
2.1 Locating the Hole Precisely
Finding the exact point of puncture on your bike tyre can seem like searching for a needle in a haystack, but precision is crucial. Start by inflating the tube slightly so you can easily identify where the air escapes. Submerging part of the wheel that's punctured underwater, like in a shallow basin, helps reveal bubbles signalling the hole. Alternatively, if water isn’t available, use a damp cloth to wipe the tyre and feel for any airflow against your skin.
Pro-tip: Use a piece of chalk or a marker to immediately mark the spot as soon as you find it. This prevents you from losing the location once you begin the patching process, especially if you step away momentarily.
2.2 Applying the Patch Correctly
Applying a puncture patch is a straightforward process once you've pinpointed the hole. Begin by roughening the surface around the puncture with sandpaper—this ensures the patch adheres properly. Clean the area with a lint-free cloth to remove any debris or sandpaper residue. Next, apply a thin layer of rubber cement and let it dry until it becomes tacky, which usually takes a minute or two.
Once tacky, press the patch firmly onto the punctured area, smoothing out any air bubbles from the centre outward. Hold for several minutes to ensure a strong bond.
Pro-tip: Always carry a compact puncture repair kit when cycling. It should include sandpaper, patches, and rubber cement, enabling you to address punctures swiftly, wherever you may be.
2.3 Ensuring the Patch Has Sealed
After patch application, it's critical to confirm that the hole is genuinely sealed to prevent any mid-ride surprises. Inflate the tube to its normal pressure, being cautious not to exceed it, which might compromise the patch. In the same way you located the puncture, test by soap solution or submersion in water to look for escaping bubbles.
If bubbles emerge, the patch may need more pressure—or there could be another leak you missed. Should everything look good, reassemble the wheel carefully, ensuring the tube sits correctly within the tyre to avoid pinch flats.
Pro-tip: Repeat patching procedures if needed, and always carry a backup patch, as even a well-set patch might occasionally fail under duress. Having Bikebook’s resources handy ensures you have a directory of local experts for tougher repairs, saving you from more significant headaches later.
3. Post-Repair Checks and Maintenance
3.1 Checking Air Pressure
After sealing a puncture, it's crucial to ensure your tyre is at the right air pressure for smoother rides and to prevent further issues. Use a pressure gauge to get an accurate reading. Check the sidewall of your tyre for recommended pressures—usually measured in PSI or Bar.
- Under-inflated tyres: This increases rolling resistance and can damage the tyre.
- Over-inflated tyres: Risks bursting or decreasing traction.
For a quick reference, gently squeeze the tyre. It should feel firm yet give slightly under your thumb. Aim to check the pressure monthly or before long rides.
Pro-tip: Invest in a quality bicycle pump with a built-in gauge. This ensures you always have the right tools on hand to adjust air pressure accurately.
3.2 When to Consult a Professional at Bikebook
Sometimes, DIY repairs might not cut it. If you notice persistent issues like constant leaks or unusual tyre wear, it might be time to call in the pros. Bikebook can connect you with local bike mechanics for expert help, ensuring all potential problems are fully addressed.
- Constant air loss: Indicates a more complex issue.
- Cracked tyres: Require professional evaluation and possibly a replacement.
- Bent wheels: Affect ride quality and safety.
Having a professional check your bike can prevent costly long-term damage. Bikebook provides access to a comprehensive list of local mechanics, so you can find reliable services nearby.
3.3 Regular Maintenance Tips to Avoid Future Punctures
Minimising punctures is all about proactive maintenance. By regularly caring for your bike, you'll ride smoother and safer. Here are some key tips:
- Clean tyres with a brush to remove debris.
- Inspect tyres for embedded objects and tread wear.
- Rotate tyres to ensure even wear.
- Check spokes and rims for damage, as they impact tyre health.
Giving attention to your bike's needs not only avoids common problems but also extends its lifespan. If maintenance feels overwhelming, Bikebook offers resources to find local experts, assisting in routine checks and repairs.
Proper post-repair checks and consistent maintenance can significantly extend the life of your bike. By ensuring tyres are adequately inflated and regularly inspected, you're investing in both performance and durability. Should any complications arise, Bikebook's platform is a reliable resource to connect with skilled local professionals, ensuring your ride remains smooth and enjoyable.
Frequently Asked Questions
What household items can I use to patch a bike tube?
You can use items like rubber bands, glue, and even electrical tape. Here's how you can make do in an emergency:
- Use rubber bands as a temporary lace.
- Apply superglue to temporary seal cracks.
- Electrical tape can wrap around the puncture.
But these are very temporary, so aim to repair properly soon.
Can you patch a bike tube with duct tape?
Yes, you can use duct tape for a short-term fix. Cut a piece to cover the hole, ensuring it's slightly larger than the puncture. Smooth it down to avoid air pockets. This isn't a long-lasting solution, so seek a permanent patching method when possible.
What to use instead of puncture repair kit?
If your repair kit is absent, consider these alternatives:
- Duct tape: For quick sealing.
- Super glue: To hold minor punctures temporarily.
- Sliced inner tube: For wrapping as a patch.
Remember to pursue permanent fixes later.
How to fix bike puncture at home?
To fix a bike puncture at home:
- Identify the puncture by slowly rotating the wheel.
- Mark the spot.
- Use any household adhesive to patch temporarily.
- Inflate the tyre and check for leaks.
Consider contacting a professional for a more enduring solution.


'%3e%3cg id='Final-Copy-2_2_' transform='translate(1275.000000, 200.000000)'%3e%3cpath class='st0' d='M7.4,12.8h6.8l3.1-11.6H7.4C4.2,1.2,1.6,3.8,1.6,7S4.2,12.8,7.4,12.8z'/%3e%3c/g%3e%3c/g%3e%3c/g%3e%3cg id='final---dec.11-2020'%3e%3cg id='_x30_208-our-toggle' transform='translate(-1275.000000, -200.000000)'%3e%3cg id='Final-Copy-2' transform='translate(1275.000000, 200.000000)'%3e%3cpath class='st1' d='M22.6,0H7.4c-3.9,0-7,3.1-7,7s3.1,7,7,7h15.2c3.9,0,7-3.1,7-7S26.4,0,22.6,0z M1.6,7c0-3.2,2.6-5.8,5.8-5.8 h9.9l-3.1,11.6H7.4C4.2,12.8,1.6,10.2,1.6,7z'/%3e%3cpath id='x' class='st2' d='M24.6,4c0.2,0.2,0.2,0.6,0,0.8l0,0L22.5,7l2.2,2.2c0.2,0.2,0.2,0.6,0,0.8c-0.2,0.2-0.6,0.2-0.8,0 l0,0l-2.2-2.2L19.5,10c-0.2,0.2-0.6,0.2-0.8,0c-0.2-0.2-0.2-0.6,0-0.8l0,0L20.8,7l-2.2-2.2c-0.2-0.2-0.2-0.6,0-0.8 c0.2-0.2,0.6-0.2,0.8,0l0,0l2.2,2.2L23.8,4C24,3.8,24.4,3.8,24.6,4z'/%3e%3cpath id='y' class='st3' d='M12.7,4.1c0.2,0.2,0.3,0.6,0.1,0.8l0,0L8.6,9.8C8.5,9.9,8.4,10,8.3,10c-0.2,0.1-0.5,0.1-0.7-0.1l0,0 L5.4,7.7c-0.2-0.2-0.2-0.6,0-0.8c0.2-0.2,0.6-0.2,0.8,0l0,0L8,8.6l3.8-4.5C12,3.9,12.4,3.9,12.7,4.1z'/%3e%3c/g%3e%3c/g%3e%3c/g%3e%3c/g%3e%3c/svg%3e) Your Privacy Choices
Your Privacy Choices