February 16, 2026
•
9 minute read
How to Fix a Pedal Crank on a Bike
You've been on a smooth ride until the unexpected hits—a pedal crank issue. Suddenly, your trusty bike isn't so reliable.
Jake Fieldsend
Founder & CFO
You've been on a smooth ride until the unexpected hits—a pedal crank issue. Suddenly, your trusty bike isn't so reliable. Whether you're in the middle of a cycling adventure or simply commuting, a malfunctioning pedal crank can disrupt your plans. Identifying and addressing common pedal crank issues at home isn't just practical; it empowers you to maintain your bike's performance and longevity. We'll walk you through recognising the symptoms, investigating the root causes, and deciding when it's best to call in a professional. Let’s get you back on the road swiftly and safely.
1. Identifying the Issue
1.1 What Signs Indicate a Problem?
Spotting pedal crank problems early can save you time and trouble. Here are the common signs you can look out for:
- Unusual noises: Clicking, grinding, or popping while pedalling.
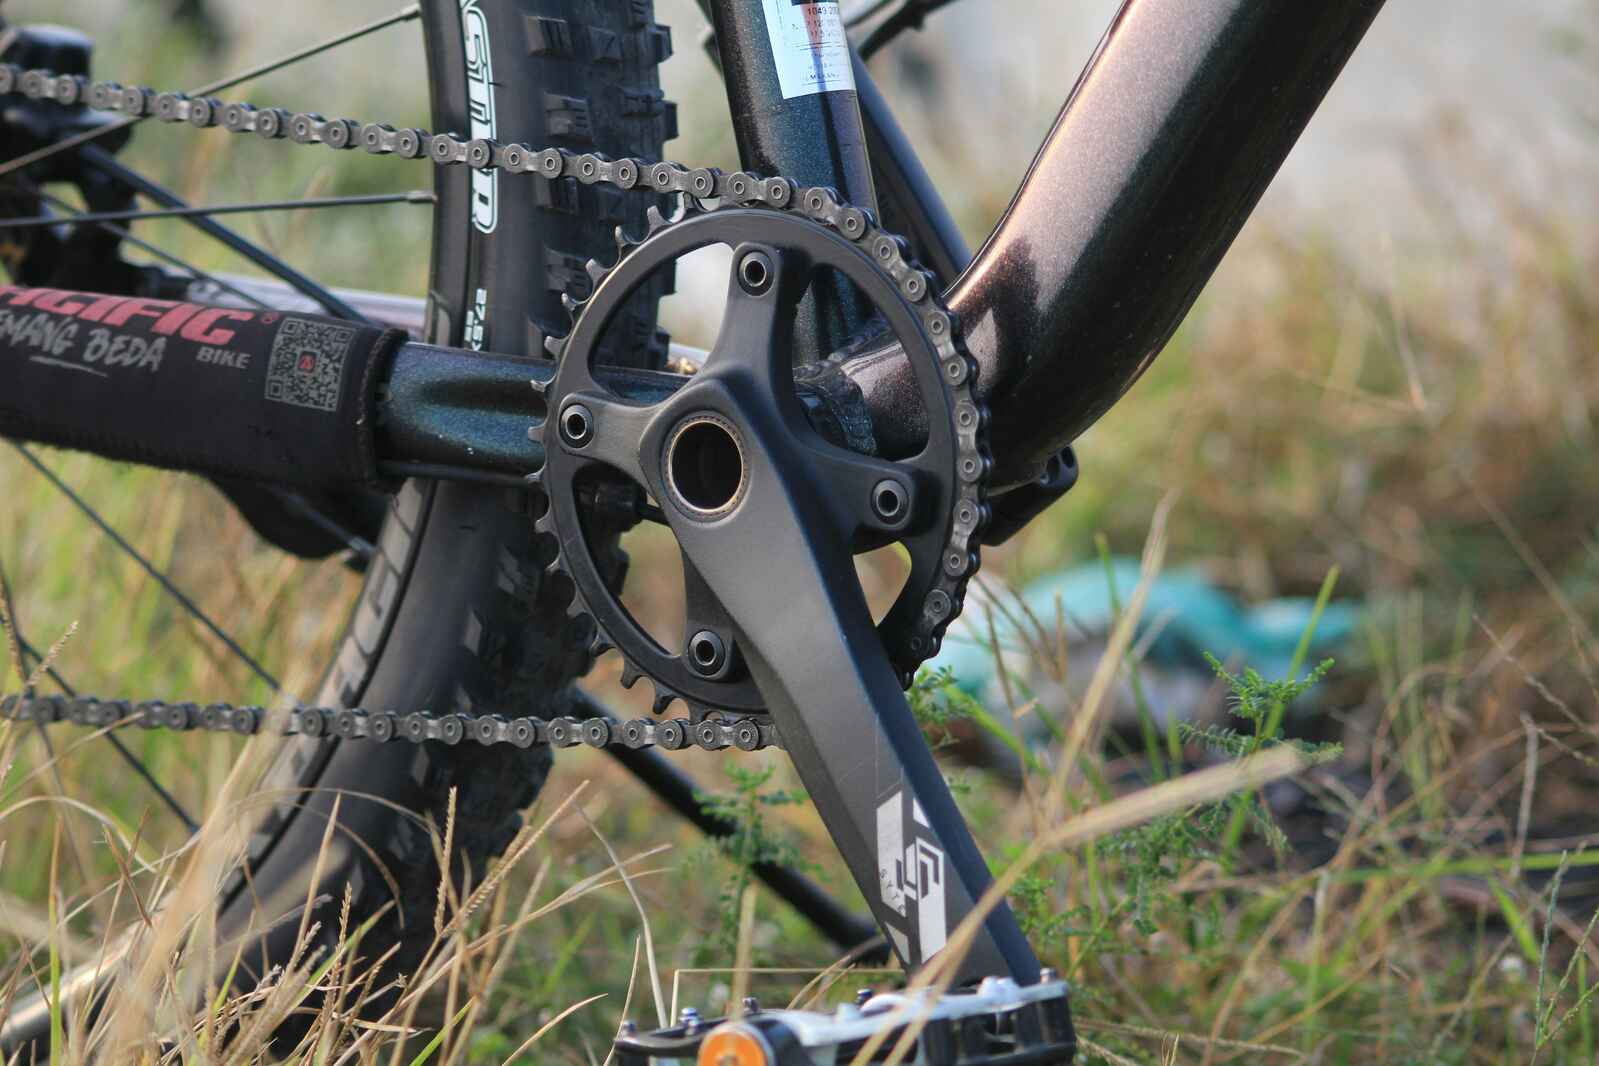
- Loose crank arms: Movement when they're supposed to be fixed.
- Inefficient pedalling: More effort needed without the corresponding speed.
- Visible damage: Any cracks or bends in the crank arm.
Identifying these signs promptly means you're less likely to face bigger issues down the line. Does your bike suddenly feel sluggish despite no change in your cadence? Your instinct might be right—your crank could be to blame.
Pro-tip: Carry a multi-tool on your rides. If noises become noticeable, you can quickly check crank tightness and avoid further damage.
1.2 Common Causes of Pedal Crank Problems
Understanding why pedal crank problems occur can help you prevent them. Consider these usual suspects:
- Wear and tear: Over time, consistent use can lead to natural degradation.
- Improper installation: Incorrect torque application can lead to loosening.
- Corrosion: Water exposure can corrode metallic components.
- Physical impact: Accidents or hitting obstacles might cause damage.
By knowing these potential causes, you can take preventative steps. Go easy with jumps or rough terrains, which can exacerbate hidden underlying issues.
Pro-tip: Regular bike maintenance can prevent corrosion. Make sure to dry your bike after wet rides and store it indoors.
1.3 When to Seek Professional Help
Not every pedal crank issue is a DIY fix. Sometimes, professional intervention becomes necessary. Consider reaching out to a professional mechanic if:
- Structural damage is evident, such as cracks or a bent crank.
- You've tried tightening, but the problem persists.
- You need specialist tools that aren't available to you.
- There’s a complete failure, affecting your safety.
If your bike is beyond your repair knowledge, using a professional service like Bikebook can ensure your bike is in capable hands. Their platform helps you find and compare local mechanics, saving you from long searches and unnecessary repairs.
Pro-tip: Leverage local services for quick and efficient solutions. A neighbourhood mechanic through platforms like Bikebook can offer personalised expertise tailored to your specific crank issues.
2. DIY Fix: How to Repair a Pedal Crank on Your Own
2.1 Tools and Materials You Will Need
When deciding to fix a pedal crank on your own, having the right tools and materials is crucial for a successful repair. Ensuring you have access to these tools can save you time and prevent further damage to your bike. Below is a comprehensive list of what you need:
- Crank Puller Tool: Essential for removing the crank arm from the axle.
- Socket Wrench and Hex Keys: These are necessary for loosening and tightening nuts and bolts.
- Bottom Bracket Tool: For bikes with a threaded bottom bracket, this tool is key for removal and installation.
- Lubricant: Helps ensure components fit smoothly together and reduces wear.
- Threadlocker: Keeps fasteners secure by preventing them from loosening over time.
Before you start, ensure you have a clean workspace. Gather all the tools and lay them out for easy access. This preparation helps you focus on the task without interruption. If you’re unsure where to find these tools, many local bike shops offer tool kits with everything you'll need. Alternatively, consider purchasing individual tools from reputable brands like Park Tool or Shimano.
Pro-tip: Having a bike repair stand can immensely help keep the bike stable, giving you both hands free to work efficiently.
2.2 Step-by-Step Guide to Fixing the Pedal Crank
Fixing a pedal crank involves several steps. By following this guide, you ensure your pedal crank is securely attached and functioning correctly. Here's what you need to do:
- Remove the Pedals: Use a pedal wrench to loosen and remove the pedals. Remember, the left pedal unscrews clockwise, and the right pedal unscrews counter-clockwise.
- Remove the Crank Arm: Use the crank puller tool. First, remove the dust cap (if your bike has one), insert the puller into the crank arm and tighten, then use the tool to remove the crank arm from the bottom bracket spindle.
- Inspect the Components: Check the crank arm and bottom bracket for any signs of damage or wear. Cracks or worn-out threads need addressing before proceeding to reassemble.
- Clean and Lubricate: Thoroughly clean the spindle and inside the crank arm. Apply a small amount of lubricant to prevent rust and ensure smooth operation.
- Reinstall the Crank Arm: Place the crank back onto the spindle, ensuring a snug fit. Use your socket wrench to tighten the bolt to the recommended torque.
- Reattach the Pedals: Screw the pedals back onto the crank arms, ensuring they are tightly secured.
After following these steps, test ride the bike to ensure everything is secure and operating smoothly.
Pro-tip: Remember to check your bike manufacturer's guidelines for specific torque settings to prevent overtightening or damaging components.
2.3 Testing the Repair
Once you have repaired the pedal crank, it is essential to verify the repair has been successful. Here's how to ensure your bike is ready for the road:
- Visual Inspection: Double-check that all bolts and components are tight. Make sure there's no movement in the crank arms when in use.
- Test Ride: Take a short ride around the block. Listen for unusual noises such as clicking or grinding, indicating the components might not be correctly installed.
- Check Alignment: Ensure the chain isn't falling off and that the crank arms are evenly placed. Misalignment can cause further issues such as chain damage.
- Monitor Performance: Over the next few rides, keep an eye out for any persistent issues or recurring sounds. If problems persist, it might be time to reassess or seek professional help.
By thoroughly testing, you can be confident in the reliability of your repair. Maintaining regular checks ensures ongoing performance and safety on your bike.
Pro-tip: For a more thorough assessment, use a torque wrench to check that all bolts are tightened to the manufacturer’s specified settings. This reduces the risk of parts coming loose over time.
3. When to Use Professional Services like Bikebook
3.1 Benefits of Choosing a Local Mechanic via Bikebook
You might wonder about the advantages of opting for a local bike mechanic through Bikebook. Well, there are plenty. Time Efficiency: You save time by avoiding exhaustive searches, thanks to accessing a vast database of local professionals all in one place. Cost-Effectiveness: Local mechanics often provide competitive prices compared to large national chains, saving you money.
Additionally, choosing someone within your community means personalised service. These professionals know the local cycling environment better and offer tailored advice, keeping you riding smoothly. Building Relationships: Working with a local mechanic can build trust and ongoing support, helpful in case of future repairs or advice on maintenance.
Pro Tip: Regular contact and building rapport with a local mechanic can lead to quicker service and valuable maintenance insights.
3.2 How to Find a Local Bicycle Mechanic with Bikebook
Do you need a reliable bike mechanic nearby without the fuss? Bikebook has streamlined the process into straightforward steps. 1. Search: Enter your postcode to explore a range of local professionals. 2. Compare: Effortlessly compare different mechanics by reading reviews and checking availability through the platform.
Once you've made your choice, 3. Contact the mechanic to set up your repair appointment. Should you need flexibility, many offer mobile service options—fixing your bike right at your doorstep. With Bikebook, everything is transparent and hassle-free, ensuring you find the right service effortlessly.
Pro Tip: Utilise real user reviews on Bikebook to choose a mechanic with proven expertise and reliability.
3.3 Ensuring Long-Term Care for Your Bike
Ensuring the longevity of your bike doesn't just rest with a one-time repair. By providing regular check-ups and maintenance, a local mechanic can help in identifying minor defects before they evolve into major issues. This is a preventative strategy that not only extends your bike's lifespan but also saves you considerably in future repair costs.
Adapting a maintenance schedule through the consensus of your trusted mechanic can lead to a smoother ride and fewer surprises on the road. They can provide personalised tips and recommend products suited to your bike's specific needs. Remember, consistent care generally equals a happier bike and a more robust ride experience.
Pro Tip: Discuss a routine maintenance plan with your local mechanic. Scheduling regular checks can prevent costly repairs down the line.
In conclusion, while DIY bike repairs might suffice for some situations, using professional services like those found through Bikebook can ensure high-quality, efficient, and personalised care for your cycling needs. This approach not only saves you time and money but also connects you with your local cycling community, bringing long-term benefits to both you and your bike.
Interested in discovering local bike mechanics or scheduling a repair service? Visit Bikebook to explore and connect with experts near you.
Frequently Asked Questions
Can a bike crank be fixed?
Yes, a bike crank can often be fixed depending on the issue. Common solutions include tightening loose bolts, replacing worn-out parts, or adjusting the crankset. If the crank arm or spindle is damaged, a replacement might be necessary.
How to fix a pedal on a bike?
Fixing a bike pedal typically involves checking for looseness and ensuring it is tightly screwed into the crank arm. Use a wrench to tighten or replace it if it's damaged. Make sure the threads are clean to avoid stripping.
How to fix a loose bicycle crank arm?
To fix a loose bicycle crank arm, follow these steps:
- Remove the crank bolt.
- Apply grease to the spindle.
- Position the crank arm properly.
- Reinsert and tighten the bolt securely.
- Check for any wobbling before riding.
How do you tighten the pedal crank on a spin bike?
To tighten the pedal crank on a spin bike:
- Use a wrench to tighten the crank nut or bolt.
- Ensure the crank arm is aligned correctly.
- Check the pedal for alignment.
- Tighten the pedals firmly to prevent slipping.
- Recheck after a few uses to ensure stability.


